
Calibrating a polar finder scope
You’ll need an accurately aligned mount for astrophotography. Perfect polar alignment in 11 steps.

If you are planning to use your mount not only to observe visually, but also for photography, precise polar alignment is essential. It is not enough to simply align the mount’s right ascension axis with Polaris, since this only an approximation and does not exactly represent the northerly extension of the earth's axis of rotation. The mount must be aligned precisely with the celestial north pole.
Before starting alignment, the polar finder scope must be calibrated
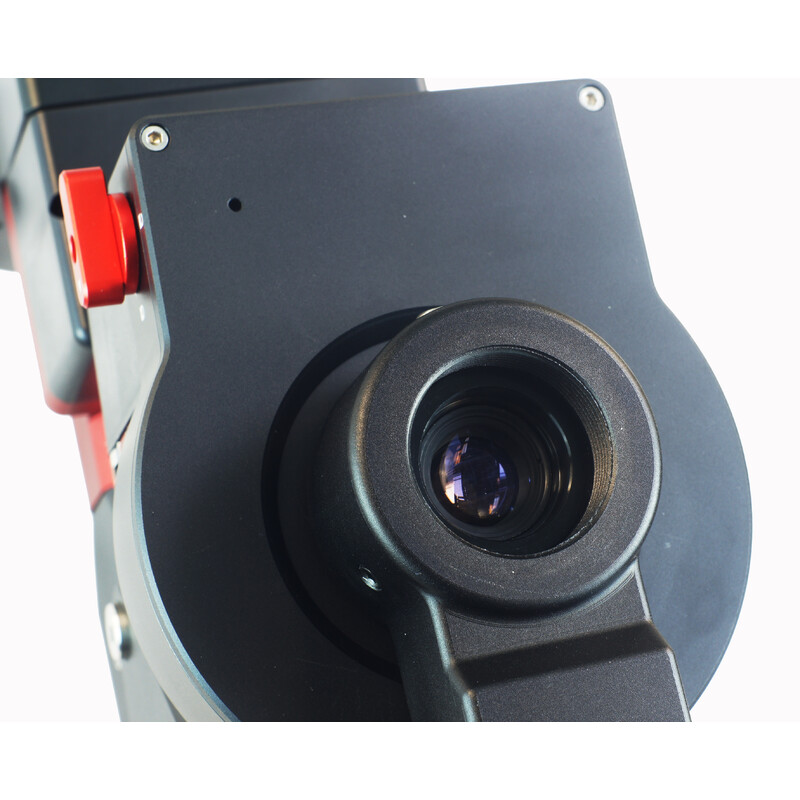
1. Remove the caps from the front and rear of the polar finder and balance the telescope.
2. Release the declination axis and rotate the telescope around the axis until it is horizontal. You should be able to see the hole that allows the polar finder to have an unobstructed view of the sky. Now re-tighten the clamp.
3. Set the altitude to around 0° and target a terrestrial object, such as a tree or a church tower. If the object appears unfocussed, focus the polar finder scope until it appears sharp. Now move the object exactly to the centre of the crosshair.
4. Next, loosen the right ascension axis and turn it 180° to the other side.
The object should now be back in the field of view and aligned on the crosshair of the polar finder. If this is the case, the polar finder is already well calibrated. If not, it needs to be aligned.
5. Next, adjust the polar finder scope using the three small screws until the object moves towards the crosshair. Now turn the right ascension axis back by 180° and check whether the object is still in the crosshair. Repeat the procedure until the object is aligned with the crosshair on both sides.
The polar finder is calibrated.
Polar alignment: a simple method
With the EQ-6, you don’t have to work with complicated scales, but instead use a depiction of the constellations which is visible through the polar finder scope. Then you can decide where the celestial pole is located relative to the position of the constellations.
1. As described above, position the declination axis horizontally so that the hole becomes visible. Now re-tighten the clamp.
2. If the polar finder has been adjusted, you will need to re-adjust the altitude for the geographic latitude of the observation location.
3. Align the mount to the north using the Pole Star. Focus the polar finder if necessary. Polaris should now be in the polar finder’s field of view.
4. Next, take note of the position of the Big Dipper and Cassiopeia in the sky. Now look through the polar finder and find these two constellations marked there.
5. Since there are no scales, loosen the right ascension axis and rotate it until the drawing of the constellations in the polar finder aligns with the real, current position of these constellations in the sky. Then clamp the axis again.
6. The positions are now aligned, but you probably won’t yet see Polaris lining up with the small circle marked in the polar finder, but it belongs exactly there. This adjustment is made via the altitude and azimuth settings. The altitude is easily adjusted with the two counter screws. With azimuth (i.e. longitude), you first have to loosen the thumb screw on the bottom of the mount. Only then can you adjust the azimuth.
If Polaris is now inside the small circle, the polar alignment is completed.